Introduction – Why Removing Old Bathroom Floors Isn’t as Simple as It Looks
If you have ever walked into your bathroom and thought, “This floor has seen better days,” you are not alone. Over time, bathroom floors take a real beating. Constant moisture, soap spills, and heavy foot traffic can turn even the toughest materials into faded, cracked, or warped surfaces.
You might be thinking, “How hard can it be to rip it out and start fresh?” The truth is that removing old bathroom flooring is not the same as pulling up carpet in your living room. Bathrooms often hide extra challenges like water damage under tiles, stubborn adhesives that refuse to come off, and awkward corners around toilets and vanities.
The good news is that this guide will walk you through everything you need to know before you start. By the time you finish reading, you will understand how to:
- Identify the type of flooring you have and why that matters
- Gather the right tools and protective gear
- Safely and efficiently remove the old floor without damaging your subfloor
- Avoid common mistakes that can slow down your renovation
The goal is to give you the confidence and knowledge to get the job done right, whether you want to handle it yourself or decide it is better to call a professional.
Understanding the Reasons for Removing Old Bathroom Floors
Before you grab a hammer or scraper, it helps to understand why you are removing the floor in the first place. Knowing the reason can guide your approach, help you choose the right replacement, and even save you money in the long run.
- Damage Beyond Repair: Bathrooms deal with a lot of moisture, and over time that can cause serious problems. Water can seep under tiles, leading to mold growth, warped wood, or crumbling grout. Once the damage has gone too far, no amount of cleaning or patching will fix it.
- Style Upgrade: Trends change, and so do personal tastes. If your bathroom floor still looks like it belongs in the 90s, updating it can instantly transform the space. A fresh floor can make the entire bathroom look cleaner, brighter, and more modern.
- Preparing for Renovation: If you are planning a full bathroom makeover, starting with a clean and stable foundation is essential. Old flooring often needs to come out before installing new vanities, bathtubs, or toilets to ensure a proper fit and finish.
- Long-Term Value: Removing old, worn flooring and replacing it with something durable and attractive can boost your home’s value. Buyers notice the condition of a bathroom, and a fresh floor can be a strong selling point if you plan to move in the future.
In short, whether your motivation is necessity or aesthetics, understanding the “why” behind the project will make it easier to choose the right removal method and replacement material.
Know Your Existing Flooring Type Before You Start
Before you start tearing up your bathroom floor, take a close look at what you are dealing with. Each flooring type has its own quirks, and knowing exactly what you have will save you time, effort, and frustration.
1. Tile (Ceramic, Porcelain, or Stone)
Tile floors are a popular choice for bathrooms because they are water-resistant and long-lasting. The downside is that they can be one of the most challenging to remove. Underneath the tiles, you will usually find a thick layer of mortar or thinset, which is applied to bond them firmly to the subfloor.
This layer is hard and stubborn, meaning you will need tools like a hammer, chisel, and possibly a rotary hammer to break it up. Be prepared for a lot of dust and heavy debris. If the tile was installed over a cement backer board, you might need to remove that too, which can add to the workload.
2. Vinyl or Linoleum
Vinyl and linoleum are often chosen for their affordability and water resistance. Newer sheets or planks can be relatively easy to lift, especially if they were installed as a floating floor without adhesive.
However, older installations are often glued down tightly across the entire surface. Removing glued vinyl means using a floor scraper, heat gun, or adhesive remover to break the bond. Keep in mind that some very old vinyl floors may contain asbestos, so testing is recommended before disturbing the material.
3. Laminate or Engineered Wood
These floors have a layered structure with a protective top surface and a wood-based core. In a bathroom, moisture can seep into the seams and cause swelling or warping, especially near the shower or tub.
If the floor is a floating installation, removal is straightforward—simply unlock the planks and lift them out. If it was glued down, expect more work. Damaged planks might splinter during removal, so gloves are a must.
4. SPC or LVP (Stone Plastic Composite / Luxury Vinyl Plank)
SPC and LVP are newer waterproof flooring options that are often installed as click-together floating floors. This makes them relatively easy to remove since you can unlock and lift the planks without damaging the subfloor.
However, in bathrooms, you might find sealed edges near tubs or vanities that need to be carefully cut through to avoid damaging walls or fixtures. If you notice signs of water intrusion under the planks, take extra time to inspect the subfloor for mold or damage before proceeding with the new installation.
Read Also: SPC vs. WPC Flooring Explained: What Works Best in 2025
Why Identification Matters
When you know exactly what you are removing, you can choose the right tools, decide how to protect your subfloor, and plan for the right disposal method. It also helps you estimate how much time the project will take, which means fewer surprises once you start.
Safety First: Tools, Gear, and Precautions
Removing a bathroom floor can get messy, noisy, and even a little dangerous if you are not prepared. The right tools and safety measures will make the job smoother and protect you from injuries or costly mistakes.
Essential Tools for the Job
Having the right equipment on hand will save you countless trips to the hardware store.
- Pry bar or crowbar – for lifting tiles, planks, or glued flooring.
- Hammer or mallet – to help break up stubborn materials and drive the pry bar under the flooring.
- Floor scraper – ideal for removing adhesive residue or thinset.
- Chisel – for popping up smaller tiles or breaking grout lines.
- Utility knife – to cut vinyl, linoleum, or SPC planks.
- Heat gun or hair dryer – for softening adhesives on vinyl or linoleum.
- Rotary hammer with chisel bit – optional, but extremely helpful for large tile removal projects.
Protective Gear You Shouldn’t Skip
Floor removal can send sharp fragments, dust, and debris flying. Protect yourself with:
- Safety glasses or goggles – to keep dust and small debris out of your eyes.
- Heavy-duty gloves – to prevent cuts from sharp edges or broken tiles.
- Dust mask or respirator – especially important if working with old materials that might contain asbestos or mold.
- Knee pads – to protect your knees during hours of kneeling.
- Sturdy work boots – to shield your feet from falling debris or dropped tools.
Precautions Before You Begin
Taking a few preventive steps before you start can save a lot of headaches later.
- Shut off the water supply if you will be working near toilets or under-sink plumbing.
- Turn off electricity to any outlets or heated floor systems in the area to avoid shocks.
- Ventilate the space by opening windows or using a fan to help clear dust and fumes.
- Check for asbestos if you are dealing with flooring from the 1980s or earlier. Hire a professional to test before disturbing the material.
- Protect nearby fixtures by covering tubs, sinks, and vanities with a drop cloth or plastic sheet.
By preparing with the right tools, gear, and safety steps, you are not only making the removal process more efficient but also avoiding injuries and accidental damage.
Step-by-Step Guide to Removing Bathroom Flooring
Once you are fully prepared, it is time to get down to business. The process will vary slightly depending on your flooring type, but these general steps will guide you through most bathroom floor removals.
Step 1: Clear the Space
- Remove all rugs, mats, and small furniture.
- Take out the toilet by shutting off the water, disconnecting the supply line, and loosening the bolts at the base. This will give you better access to the floor and prevent damage to the toilet.
- If possible, remove the vanity or at least loosen it from the wall so you can work around it without leaving old flooring trapped underneath.
- Take off baseboards and trim using a pry bar. Keep them in good condition if you plan to reuse them.
Step 2: Start Loosening the Flooring
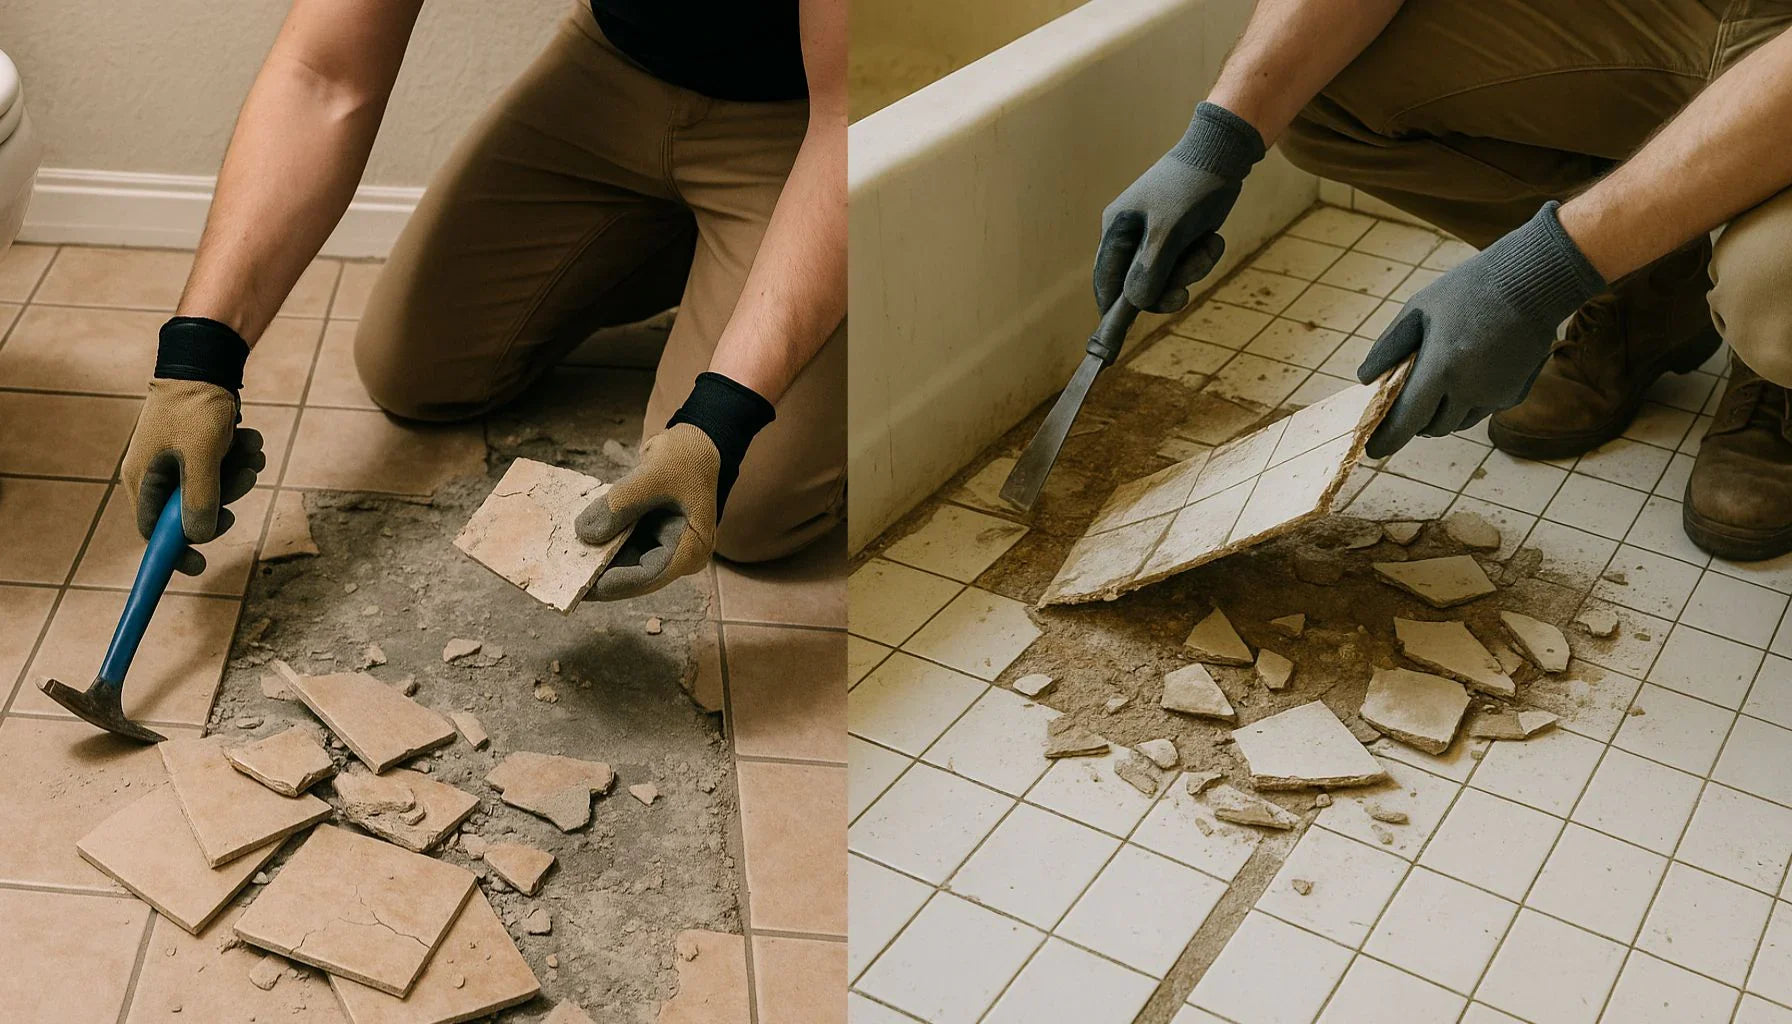
- Tile floors: Break the first tile with a hammer and chisel to create an opening, then work outward. Use a floor scraper or rotary hammer for stubborn sections.
- Vinyl or linoleum: Start at a corner and pull up the sheet or planks. If it is glued down, use a heat gun to soften the adhesive and scrape it up as you go.
- Laminate, SPC, or LVP: Unlock the planks starting at one wall and lift them out. Work systematically to avoid damaging the locking edges if you plan to reuse them elsewhere.
Step 3: Remove Adhesive or Mortar
- For tile, use a floor scraper or chisel to chip away the thinset mortar.
- For vinyl or linoleum, apply adhesive remover if scraping is too difficult. Allow the remover to sit for the recommended time before scraping again.
- Be thorough, as leftover adhesive or mortar can cause issues with your new flooring installation.
Step 4: Inspect and Repair the Subfloor
- Look for signs of water damage, soft spots, or mold.
- If you find damaged areas, cut them out and replace them with new subfloor panels before installing new flooring.
- Check that the surface is smooth and level. Use a leveling compound if necessary.
Step 5: Clean Up the Area
- Vacuum up dust and debris with a shop vac.
- Wipe down the subfloor with a damp cloth to remove any fine dust before moving forward.
- Dispose of old flooring materials according to local regulations or recycling guidelines.
Following these steps will leave you with a clean, solid base that is ready for the next stage of your bathroom makeover.
Common Mistakes to Avoid During Floor Removal
Even with the best intentions, it is easy to run into problems when removing a bathroom floor. Knowing the most common mistakes will help you avoid frustration, wasted time, and costly repairs.
- Skipping Safety Measures: Many DIYers start working without proper protective gear. This can lead to cuts from sharp tile edges, eye injuries from flying debris, or breathing in harmful dust. Always wear safety glasses, gloves, and a mask.
- Using Too Much Force: It is tempting to swing a hammer harder to speed up the job, but too much force can damage your subfloor or nearby fixtures. Work steadily and carefully, especially if you are dealing with a wooden subfloor that needs to stay intact.
- Ignoring Hidden Water Damage or Mold: Sometimes, the floor looks fine from the top but hides rot, mold, or water damage underneath. Skipping a thorough inspection can mean installing new flooring over a weak base, which will cause problems later. Always check and repair the subfloor before moving on.
- Forgetting About Waste Disposal: Bathroom flooring, especially tile, can be heavy and bulky. If you do not plan how to dispose of it, you might end up with piles of debris sitting in your home. Check local disposal rules ahead of time and consider renting a small dumpster if needed.
- Not Preparing the Subfloor for New Installation: Leaving behind adhesive, mortar, or uneven surfaces will make installing the new floor much harder and less secure. Take the extra time to scrape and smooth the subfloor so your new flooring lasts longer.
Avoiding these mistakes will make the removal process smoother and ensure that your new bathroom floor is built to last.
When to DIY and When to Call a Pro
Removing a bathroom floor can be satisfying if you enjoy hands-on projects, but it is not always the best choice for every situation. Knowing when you can handle it yourself and when it is smarter to bring in a professional will save you time, stress, and possibly money.
When DIY Makes Sense
- Small bathrooms or powder rooms where the job is manageable in a weekend.
- Floating floors like SPC, LVP, or laminate that can be unlocked and lifted without heavy tools.
- No signs of serious water damage or mold under the flooring.
- You already own or can easily rent the necessary tools.
- You enjoy doing renovation work and have the patience to do it carefully.
When You Should Call a Professional
- Suspected asbestos in old vinyl, linoleum, or adhesive. This requires specialized testing and safe removal.
- Extensive water damage that has affected the subfloor or structure underneath.
- Large tiled bathrooms with thick mortar beds that are extremely labor-intensive to remove.
- Heated floors where electrical wires or tubing could be damaged during removal.
- You have time constraints and need the job done quickly and cleanly.
Cost Considerations
DIY removal can save on labor costs, but you still need to factor in tool rentals, disposal fees, and possible repairs if mistakes are made. A professional will cost more upfront, but they will bring expertise, the right tools, and often complete the job faster with less mess.
The bottom line: if the job is straightforward and safe, DIY can be a great option. If it involves health risks, heavy labor, or complex situations, investing in a pro is worth it.
Preparing for Your New Bathroom Flooring
Once the old floor is gone, it is time to get your space ready for its fresh new look. Proper preparation will make installation easier and ensure your new floor lasts for years.
1. Choose the Right Replacement Material
Bathrooms demand flooring that can handle moisture and daily wear. Popular options include:
- Ceramic or porcelain tile for classic durability.
- SPC or LVP planks for a waterproof, modern look.
- Vinyl sheets for budget-friendly and seamless coverage.
-
Engineered wood if you want warmth and style, but with moisture resistance.
Look for slip-resistant finishes to keep your bathroom safe.
2. Measure Carefully: Even a small measuring mistake can mean wasted materials or an incomplete installation. Measure the length and width of the bathroom, then multiply to get the total square footage. Always add 10% extra for cutting and fitting around corners or fixtures.
3. Repair and Smooth the Subfloor: A new floor needs a solid, even foundation. Replace any damaged subfloor panels, fill in holes or gaps, and use a leveling compound if necessary. A smooth base will make the installation neater and help prevent squeaks or movement later.
4. Plan for Moisture Protection: For extra durability, consider adding a moisture barrier, especially if your subfloor is wood. This helps protect against leaks and humidity that can damage the floor over time.
5. Schedule Your Installation: Once the subfloor is ready, arrange your installation timeline. If you are DIY-ing the install, set aside enough uninterrupted time. If you are hiring a professional, confirm dates so your bathroom is out of service for as little time as possible.
Preparing your bathroom properly now will save you headaches later and ensure your new flooring looks beautiful for years.
Eco-Friendly Disposal & Recycling Options
Once you have pulled up your old bathroom floor, the next question is what to do with all that debris. Instead of tossing everything into a landfill, there are ways to dispose of flooring materials that are better for the environment and sometimes even your wallet.
1. Recycle Where Possible
- Ceramic and porcelain tiles can often be crushed and repurposed as construction fill or road base. Some recycling centers accept them directly.
- Vinyl and SPC planks may be recyclable, depending on the manufacturer and local facilities. Check with your municipal recycling program for guidelines.
- Wood or engineered wood flooring can sometimes be ground into mulch or used for fuel in specialized facilities.
2. Donate Usable Materials: If your flooring is still in good condition and was removed carefully, consider donating it to a local reuse center, community project, or charity like Habitat for Humanity ReStores. Someone else might be able to give it a second life.
3. Repurpose for DIY Projects: Leftover planks or tiles can be turned into small furniture pieces, plant stands, or even wall décor. Not only does this reduce waste, but it also gives you unique home accents.
4. Follow Local Disposal Rules: Many cities have specific guidelines for construction waste disposal. Some require you to separate materials, while others may offer scheduled pick-ups or drop-off sites. Check before you load everything into your car or dumpster.
5. Consider Renting a Small Dumpster: For large amounts of heavy debris like tile or mortar, a mini dumpster can make cleanup easier and faster. Choose a company that sorts materials for recycling after collection.
By handling your old flooring responsibly, you are reducing environmental impact and sometimes even helping others, all while clearing the way for your beautiful new bathroom floor.
Final Thoughts – Making the Process Smooth and Stress-Free
Removing an old bathroom floor can feel like a big project, but with the right preparation and mindset, it is completely manageable. The key is to know what you are working with, have the right tools and safety gear ready, and take your time to do it properly.
Remember to:
- Identify your flooring type so you can use the best removal method
- Put safety first to protect yourself and your home
- Inspect and repair the subfloor before installing anything new
- Plan for eco-friendly disposal to reduce waste
By approaching the job step by step, you will avoid common mistakes and create a solid foundation for your next bathroom upgrade. Whether you choose to tackle it yourself or call in a professional, the effort you put in now will pay off in the look, feel, and durability of your new floor.
So roll up your sleeves, follow the guide, and enjoy the satisfaction of transforming your bathroom from the ground up.
Now that the hard part is done and your old floor is out, it’s time for the exciting part — picking the perfect new one.
At Golden Elite Deco, we make that step easy with a wide selection of beautiful, durable, and waterproof bathroom flooring options. You can explore our styles online from the comfort of your home or visit our Montreal store to see and feel the quality in person. With convenient delivery across Quebec, your new bathroom floor is closer than you think.


